
Streets for Everyone
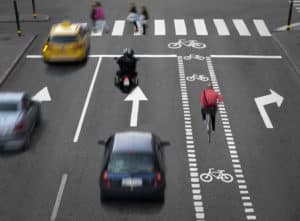
While streets of yesteryear were designed with only cars in mind, more and more cities are recognizing the need for streets to be safe for everyone. Street needs change by location and use. But most of them have more than just cars traveling on them. Safer streets need to keep in mind the needs of pedestrians and bikers too. That includes creating dedicated bike lanes on popular bike routes.
Can Red Cups Protect Bike Lanes?
The Red Cup Project was a recent phenomenon that shed light on the idea that paint alone is simply not enough to protect cyclists. Red plastic cups filled with water were placed on the white lanes of bike lanes in Boston, New York, Denver, and more. Then people waited to see what would happen to the cups when traffic passed. Car after car entered the bike lane and crushed the cups, spilling the water, and proving that paint on the ground isn’t enough to protect human lives.
 Smarter Separation
 Smarter Separation
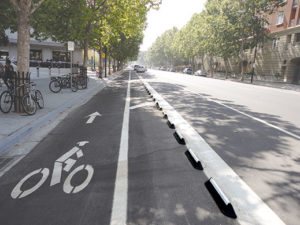
Traffic Logix offers a smarter way to protect cyclists. Our CycleLane rubber curbing provide a physical barrier and designated space just for bikers. The unique rubber curbs have a two sided profile. The higher side faces traffic, preventing cars from entering the bike lane. The second side is sloped to gently guide bikers back into the bike lane and keep them safe. The CycleLane curbing helps cities around the country to protect bicyclists on their roads.
Plus Perks
It’s true that our CycleLane curbing protects cyslists and creates designated traffic lanes. But it offers some more perks too. CycleLane curbing is highly visible. It includes bright highway tape in the color of your choice. Moreover, it’s environmentally friendly. And finally, it’s quick and easy to install. Simply bolt the prefabricated units down along your designated bike lane.