


| Width | 18” (+/- 1/16”) |
| Length | 42” (+/- 1/8”) |
| Thickness | 3” (+/- 1/8”) |
SPEED CUSHIONS
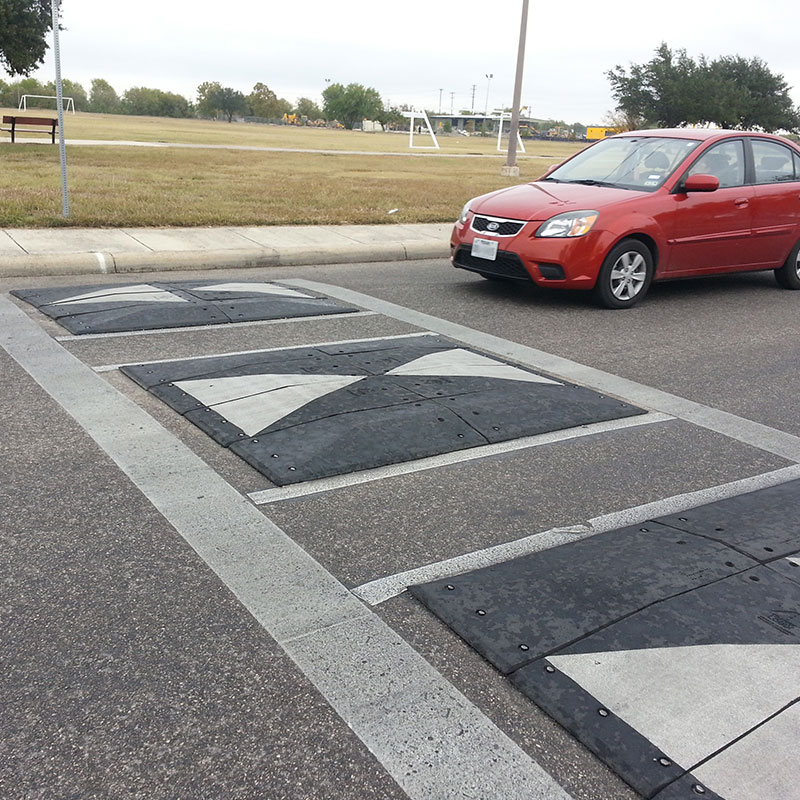
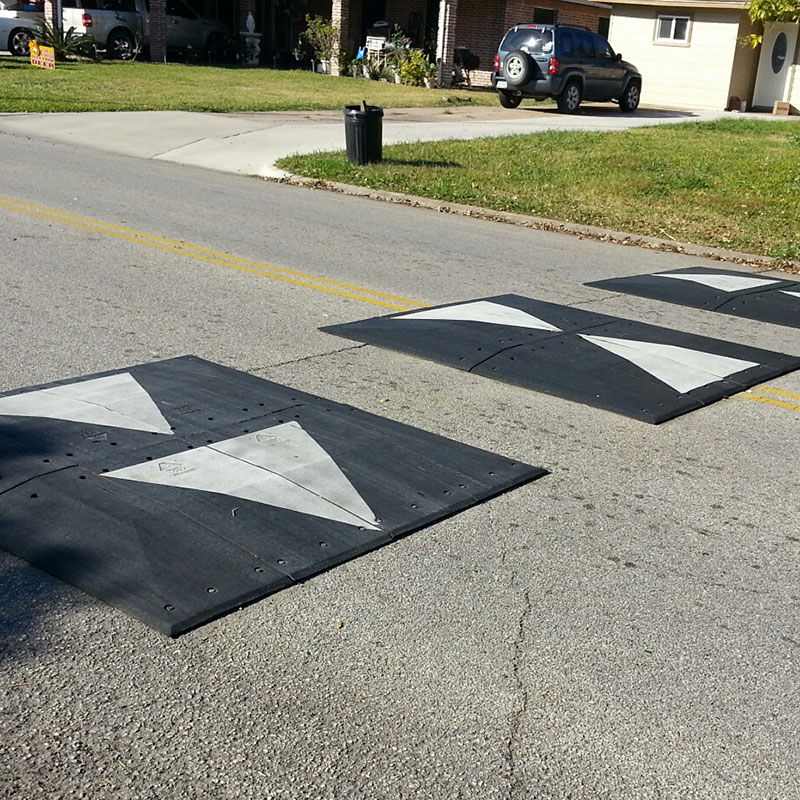
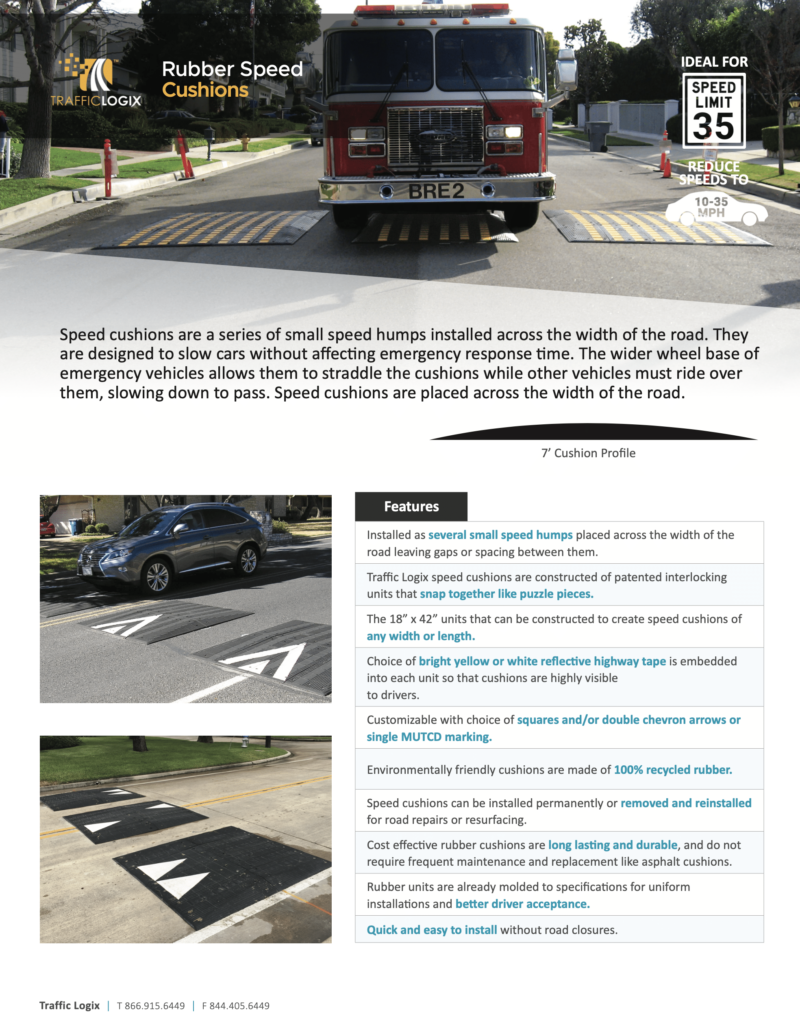
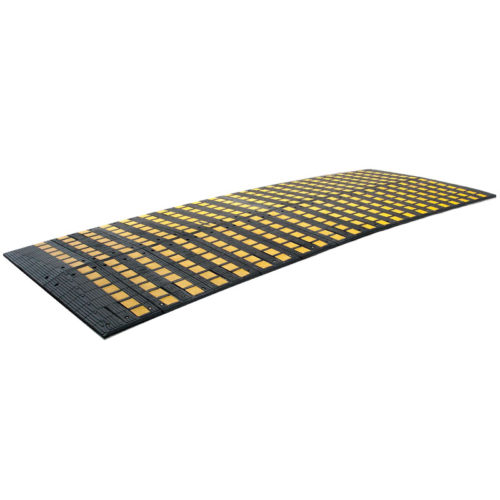
Traffic Logix recycled rubber speed cushions or speed lumps are a series of small speed humps installed across the width of the road. Designed to be wide enough to slow cars while narrow enough for emergency vehicles to straddle, speed lumps are ideal for streets where emergency response time is a concern.
Speed cushions slow cars to between 15-20 mph. Made of interlocking units that simply snap together, Traffic Logix speed cushions are quick and easy to install. Typically 3” high and 7’ long, speed cushions are an innovative solution that can help slow speeders and protect your roads without slowing emergency vehicles.
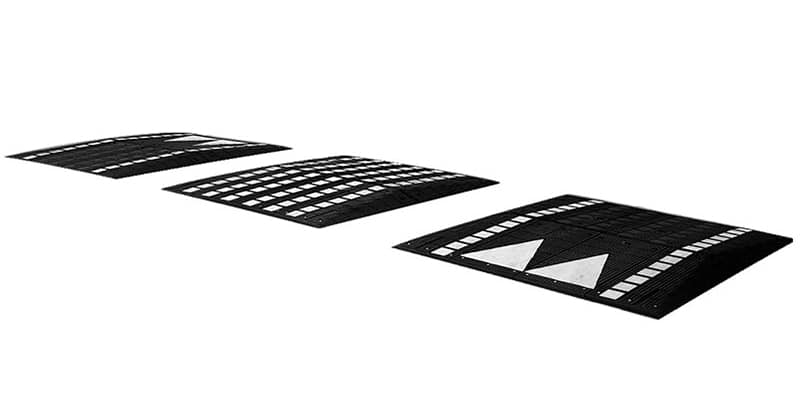
Standard Markings
Markings are embedded into rubber during manufacturing process. Reflective markings are available in yellow or white squares, white arrows, or any combination of the three as illustrated below.
Download the product sheet
Features:
• Series of small speed humps
• Interlocking, puzzle piece design
• Highly visible with bright highway tape
• Environmentally friendly
• Quick and simple to install
• Customizable sizing & taping
• Interlocking, puzzle piece design
• Highly visible with bright highway tape
• Environmentally friendly
• Quick and simple to install
• Customizable sizing & taping
Specs
Module Dimensions
Speed Cushion Specs
| Width | From 36” & up, by 18” increments |
| Length | From 72” & up by 42” increments |
| Height | 3” |
Standard Speed Cushion Specs
| Width | 72” |
| Length | 84” |
| Height | 3” |
| Warranty | 2 Years |
Physical Properties
| Material | 100% recycled synthetic and natural rubber composite. |
| Tensile strength | Minimum 500 psi |
| Shore hardness | Minimum 70A |
| Specific gravity | 1.1 |
| Markings | Rubber modules are available in all black, black with yellow or white reflective square markings, or with white reflective arrow chevrons. |
Vehicle Wheel Track
Speed cushions aim to slow cars just as speed humps do but without interfering with emergency vehicles. It’s easy to be wary of that claim. Can’t other vehicles straddle the cushions too? Can emergency vehicles really ride over them without slowing?
For speed cushions to be effective, the sizing has to be precise; narrow enough for emergency vehicles to straddle but wide enough that typical vehicles can’t. At 72”, the Traffic Logix rubber speed cushions do just that. The chart below outlines typical vehicles wheel tracks, demonstrating the premise that Traffic Logix speed cushions are effective in slowing traffic, while narrow enough for typical ambulances and firetrucks to ride right over.
Automobiles
| Model | Wheel Track (in) |
| ACCORD | 61” |
| AUDI | 62”-65” |
| BMW | 60”-63” |
| LA CROSSE/REGAL | 62” |
| VERANO | 60” |
| CADILLAC | 60”-62” |
| CAMARO | 64” |
| CORVETTE | 63” |
| IMPALA/MALIBU | 62” |
| CHALLENGER/CHARGER | 63” |
| CHRYSLER 200 | 62” |
| CHRYSLER 300 | 63” |
| DART | 62” |
| FOCUS | 61” |
| FUSION | 63” |
| TAURUS | 66” |
| MUSTANG | 62” |
| INFINITI | 60”-62” |
| JAGUAR | 61”-64” |
| JETTA | 60” |
| LEXUS | 60”-64” |
| MERCEDES | 60”-64” |
| ALTIMA/MAXIMA | 62” |
| SENTRA | 60” |
| CAMRY/AVALON | 63” |
| COROLLA | 60” |
Trucks
| Model | Wheel Track (in) |
| EXPRESS | 68” |
| F-150 | 67” |
| F-250/F350 | 68” |
| FRONTIER | 62” |
| GMC 1500/2500/3500 | 69” |
| RAM 1500 | 68” |
| RAM 2500 | 69” |
| SILVERADO | 69” |
| TACOMA | 61” |
| TITAN | 68” |
| TRANSIT | 69” |
| TUNDRA | 68” |
SUV
| Model | Wheel Track (in) |
| EQUINOX | 63” |
| ESCAPE | 62” |
| EXPEDITION/EXPLORER | 67” |
| SEQUOIA | 68” |
| SUBURBAN/TAHOE | 68” |
| YUKON/YUKON XL | 68” |
| LAND CRUISER | 65” |
Fire Truck
| Model | Wheel Track (in) |
| H & W | 74”-83” |
| PIERCE | 76”-84” |
| FREIGHTLINER | 75”-79” |
| KENWORTH | 75”-79” |
| INTERNATIONAL | 75”-79” |
| SPARTAN | 75”-79” |
Ambulance
| Model | Wheel Track (in) |
| F-450 CHASSIS | 75” |
| GMC CHASSIS | 75” |
| LIFE LINE | 72”-75” |
| DEMERS | 75”-79” |
Why Speed Cushions?
Speed humps and speeds tables are both effective tools for reducing speeds on residential roads. So why choose speed cushions?
Many cities are concerned about using physical traffic calming devices to slow cars down. Slower cars may mean safer roads, but what happens when an ambulance or fire truck has to slow down too? At the higher speeds these vehicles travel at, slowing to 15-20 mph is significant, and can have tragic results. Whether the safety concern is on a primary response route that is often used by emergency vehicles as they head to the closest medical facility or simply on ordinary neighborhood streets, response time is an obstacle that often prevents cities from using speed humps on their roads.
And rightfully so.
In many emergencies, the difference of an extra minute, seconds accrued as a vehicle slows to traverse each speed hump, can mean the difference between life and death. That’s where speed cushions come in.
Speed cushions are a series of small speed humps installed across the width of the roadway. While the diminished need for materials with speed lumps or cushions translates into decreased cost, price is not usually the key reason that cities or communities choose them.
Speed cushions are designed to be precisely narrow enough that emergency vehicles, with their wider axles, can drive over them without slowing. For cities concerned with emergency vehicle response time, these are the ideal traffic calming devices that keep firetrucks and ambulances moving while still protecting local roads.
Cars, with their narrower wheelbase, have no choice but to drive over the speed cushions with one or both wheels on the traffic calming device. This causes them to slow down, reducing speeds and preventing crashes and injuries.
Can They Really Do That?
Speed cushions claim to slow cars just as speed humps do but without interfering with emergency vehicles. It’s easy to be wary of that claim. Can’t other vehicles straddle the cushions too? Can emergency vehicles really ride over them without slowing?
For speed cushions to be effective, the sizing has to be precise; narrow enough for emergency vehicles to straddle but wide enough that typical vehicles can’t. At 72”, the Traffic Logix rubber speed cushions do just that. The chart below outlines typical vehicles wheel tracks, demonstrating that Traffic Logix speed cushions are effective in slowing traffic, while narrow enough for typical ambulances and firetrucks to ride right over.
Why Rubber?
While the case can be made to use recycled rubber for all your physical traffic calming devices, rubber speed cushions are the choice of many cities even when they use asphalt speed humps and speed tables. Why? Speed cushions need to be constructed with rigorous precision in order for them to be just the right size to let emergency vehicles pass while slowing cars down. This can be difficult to attain with asphalt. The pre-formed rubber units of the Traffic Logix recycled rubber speed cushions ensure that you’re getting just the size and shape you need for precise speed control.
RELATED PRODUCTS
Speed Humps

Speed Tables

Cycle Lane
