


| Width | 18” |
| Length | 42” |
| Thickness | 3” |
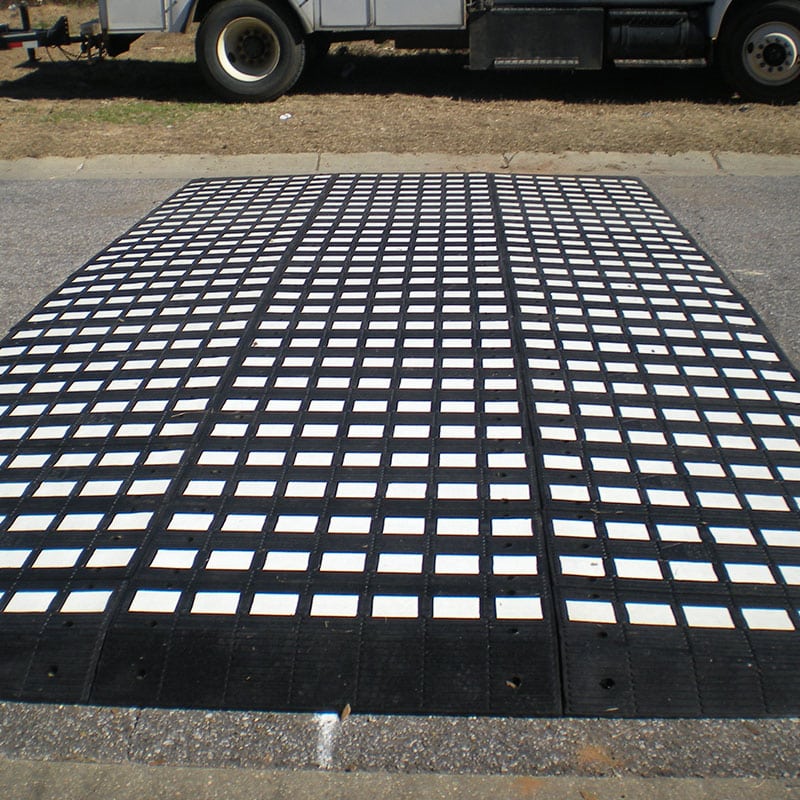
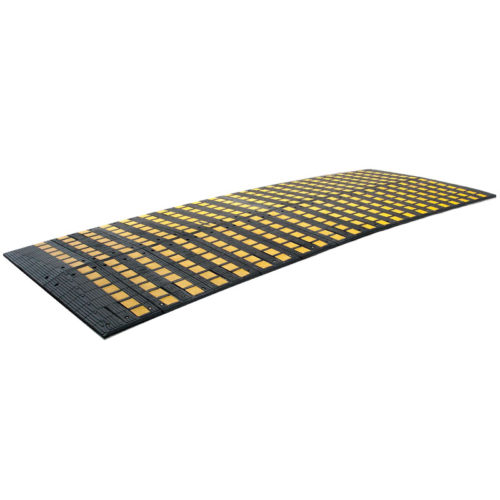
SPEED TABLES
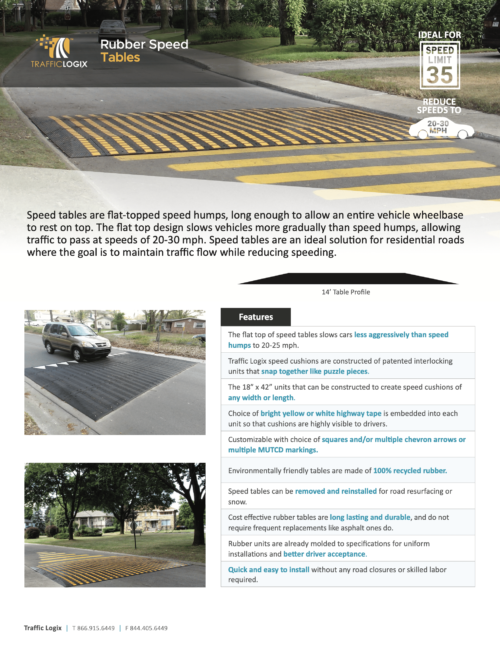
Traffic Logix recycled rubber speed tables are flat-topped speed humps with room for the entire wheelbase of a passenger car to rest on top. The flat top design allows cars to maintain slightly higher speeds than they would on speed humps, slowing cars to around 20-25 mph.
Made of interlocking units that simply snap together, Traffic Logix speed tables are quick and easy to install. Typically 3” high and 14’ or 21’ long, speed tables are an effective solution for safer neighborhood streets.
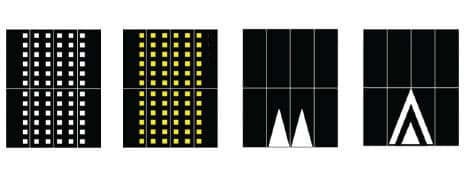
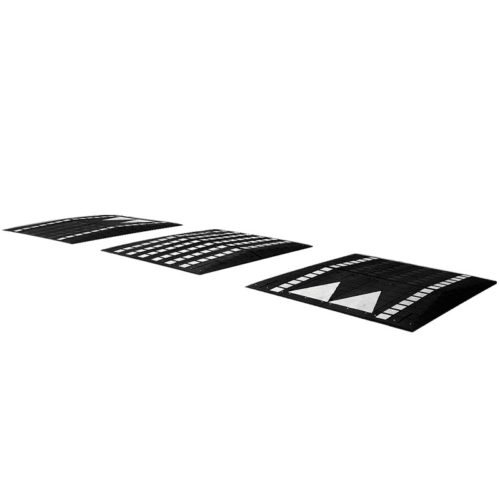
Standard Markings
Markings are embedded into rubber during manufacturing process. Reflective material in Yellow or White Squares Reflective material in White Arrows.
Download the product sheet
Features:
• Flat topped speed humps
• Interlocking, puzzle piece design
• Highly visible with bright highway tape
• Environmentally friendly
• Quick and simple to install
• Customizable sizing & taping
• Interlocking, puzzle piece design
• Highly visible with bright highway tape
• Environmentally friendly
• Quick and simple to install
• Customizable sizing & taping
Specs
Unit Specs
Speed Table Specs
| Width | From 84” & up, by 18” increments |
| Length | From 72” & up, by 42” increments |
| Height | 3” or 4” |
Standard Speed Table Specs
| Width | 14’ or 21’ |
| Length | 84” |
| Height | 3” or 4” |
| Warranty | 2 Years |
Physical Properties
| Material | 100% recycled synthetic and natural rubber composite |
| Tensile strength | Minimum 500 psi |
| Shore hardness | Minimum 70A |
| Specific gravity | 1.1 |
| Markings | Rubber modules are available in all black, black with yellow or white reflective square markings, or with white reflective arrow chevrons |
Speed Bump, Speed Hump or Speed Table?
If you’re involved in traffic calming for a city, private community, or corporate campus, you probably already know that speed bumps are abrupt, aggressive devices that slow cars almost to a halt. They’re appropriate in parking lots or driveways but are not traffic calming tools for residential streets.
But speed humps and speed tables both are. So why choose one over another?
Speed humps are rounded in shape. They curve up and then curve back down, without ever having a flat surface on top. Speed tables, on the other hand, are flat-topped. Depending on the length of the speed table, the entire wheelbase of a car can often rest on top of it. What practical difference does that design make though?
What is the Ideal Speed for Your Roads?
The first question you want to consider when deciding between speed humps and speed tables is what the speed limit is on your roads. Speed humps, while far less aggressive than abrupt speed bumps, still slow cars more significantly than speed tables do. Speed tables are ideal for streets with typical residential speed limits of around 25 mph. They help to keep traffic flowing but at a safer pace. Many cities prefer speed tables over speed humps for the calmer, smoother experience they offer drivers. Other cities may prefer the more aggressive approach that speed humps offer, particularly on streets with lower speed limits.
Emergency Vehicles
The less significant speed reduction is also a consideration for cities that don’t want abrupt traffic calming devices that will significantly impede emergency vehicles. While speed tables don’t allow ambulances to pass without slowing, they do offer an option that slows them less drastically. This can also be helpful on bus routes or on any roadways where cities want to slow cars down to improve safety but also want to keep the flow of traffic smooth and constant.
RELATED PRODUCTS
Speed Humps
Speed Cushions

Cycle Lane
